Camera-Specific Settings
KOMET supports a wide range of cameras with multi-vendor compatibility, using USB PTP communication to control the camera via the USB interface. However, specific camera models may require certain settings to be configured before using KOMET. These settings enable the USB PTP link, ensuring smooth communication and control via KOMET.
Below are camera-specific guidelines, along with some general recommendations:
General Settings
- Set the camera to Manual mode “M”.
- Use a native ISO setting (not Auto).
- If shooting RAW, set RAW+JPEG for mobile app preview.
- Disable Long Exposure Noise Reduction.
- Set lens in Manual Focus “MF”.
- Disable Image Stabilization (Optional).
Brand Specific Settings
- Having internal WiFi must needs to be disabled (e.g. EOS 6D)
If you observe any additional settings required for your specific camera, we’d be eager to hear your feedback. Please let us know at hello@lumionix.com.
Hot Shoe Mount
The KOMET-TR can be easily attached to your camera by sliding it into the camera’s hot shoe. When sliding the unit in, press the Quick-Release Button and release it once secured. KOMET-TR’s hot shoe includes a pin-locking mechanism to ensure a secure fit.
To remove the KOMET-TR, press the release button again and slide it out gently.
USB Connection
Connect the appropriate USB cable between KOMET-TR and your camera. Ensure the camera is powered Off when plugging in the USB cable. Once the cable is securely attached, power ON the camera. KOMET-TR should detect the camera and display it on the screen.
Detection is typically quick for Canon and Nikon cameras, but Sony Alpha cameras may take slightly longer to be recognized._
Touchscreen App UI
The KOMET-TR Touchscreen App displays helpful setup instructions when a compatible camera is detected. Follow the on-screen prompts to configure your camera for USB communication compatibility.
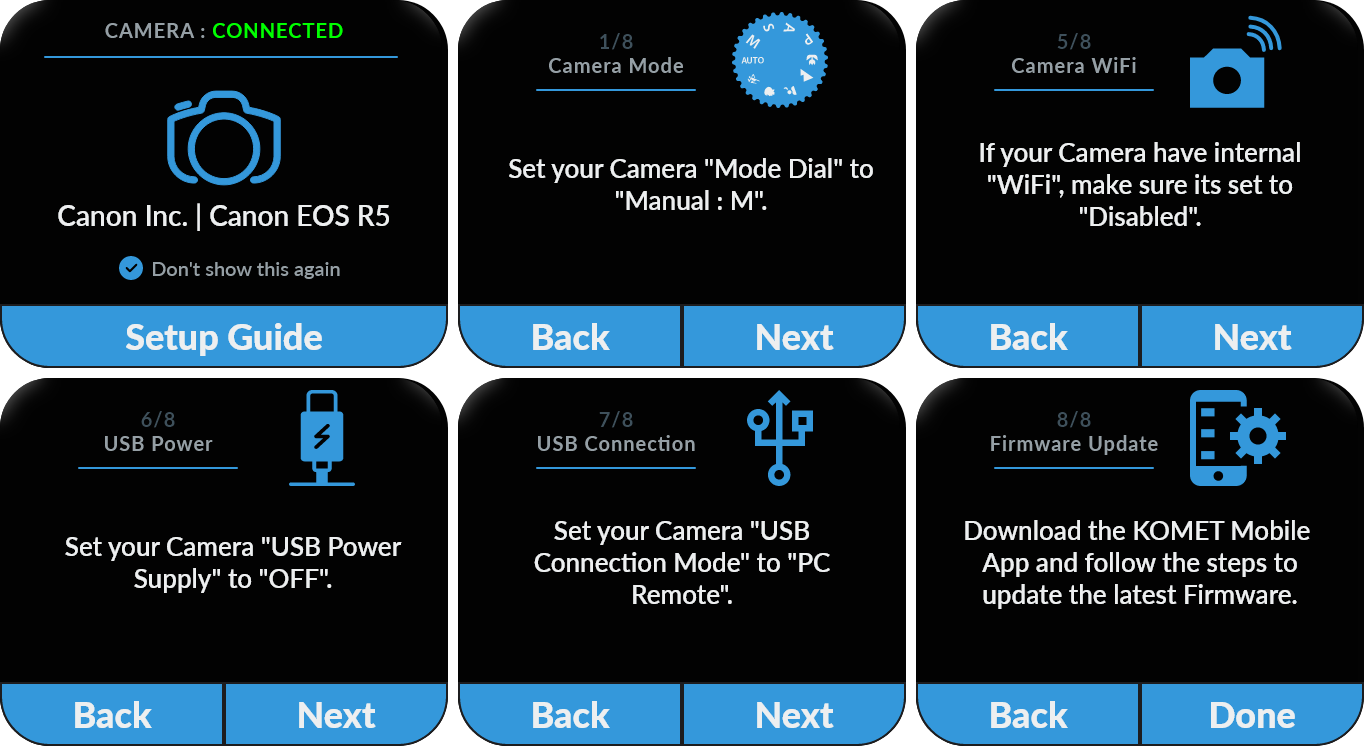
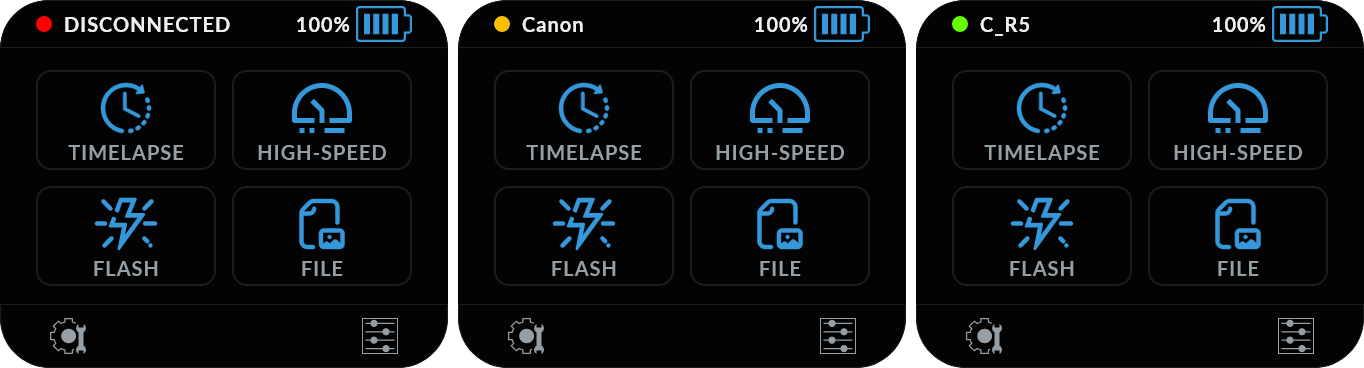
When the Ionec Camera is attached, the KOMET-TR screen displays one of three status indicators:
🔴Red Dot: Camera is disconnected.
🟡Yellow Dot: Camera manufacturer is detected, but the model is not identified.
🟢Green Dot: Both the camera manufacturer and model are successfully detected.
The KOMET-TR’s intuitive Touchscreen App provides access to nearly all features except for Camera Remote functionality. Detailed instructions for using the touchscreen UI will be covered in corresponding sections.
Mobile App UI
The KOMET mobile app is professionally designed and user-friendly and enables wireless control of the KOMET-TR and your camera via WiFi. It’s available for both iOS and Android platforms.

-
iOS App: https://www.lumionix.com/komet/ios-app (opens in a new tab)
-
Android App: https://www.lumionix.com/komet/android-app (opens in a new tab)
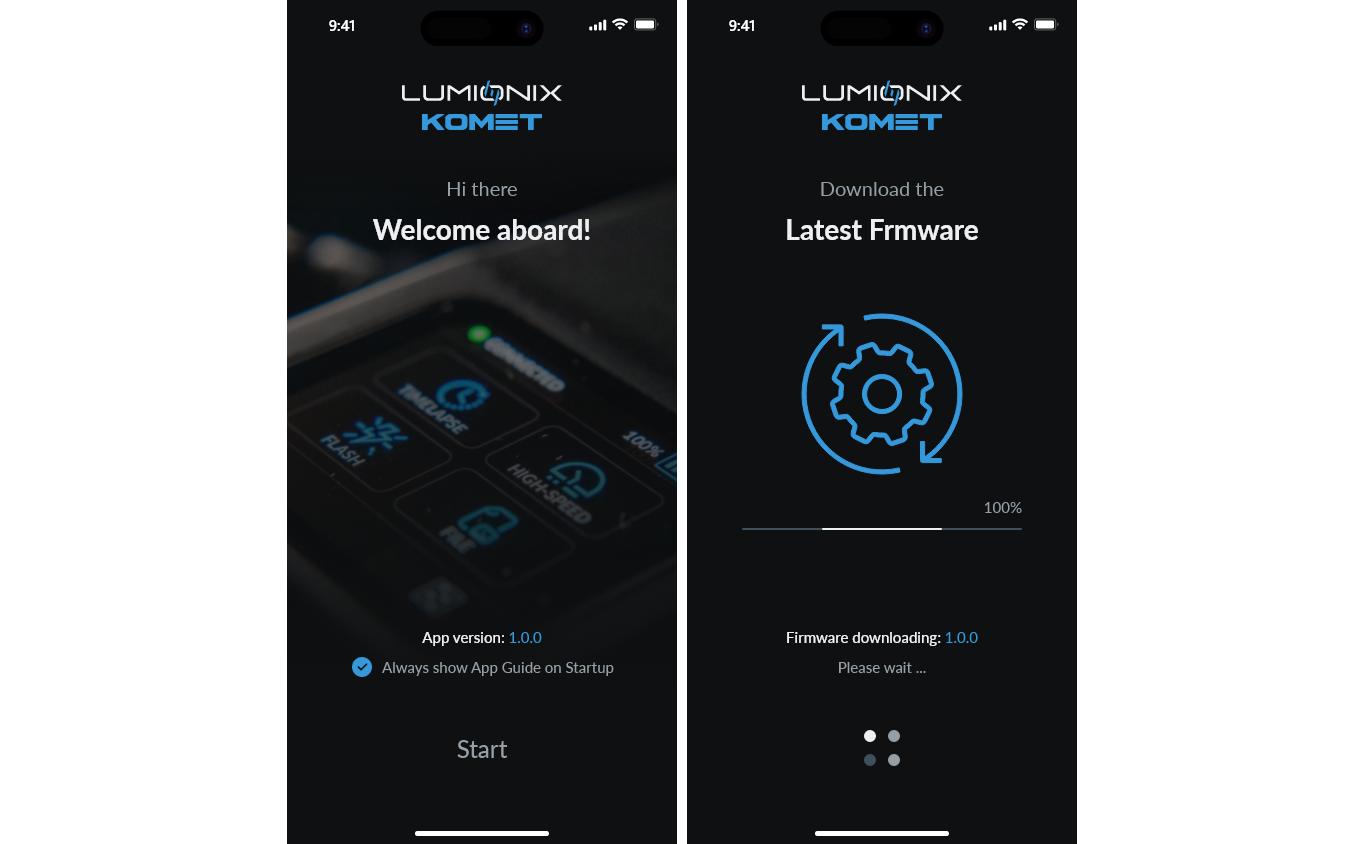
Download Latest Firmware
When you launch the app, you’ll see an option to download the latest KOMET firmware via the internet. We highly recommend keeping your firmware up to date to ensure the best performance and access to the latest features. The app will prompt you for permission to install the firmware onto your KOMET once connected, if an update is required.
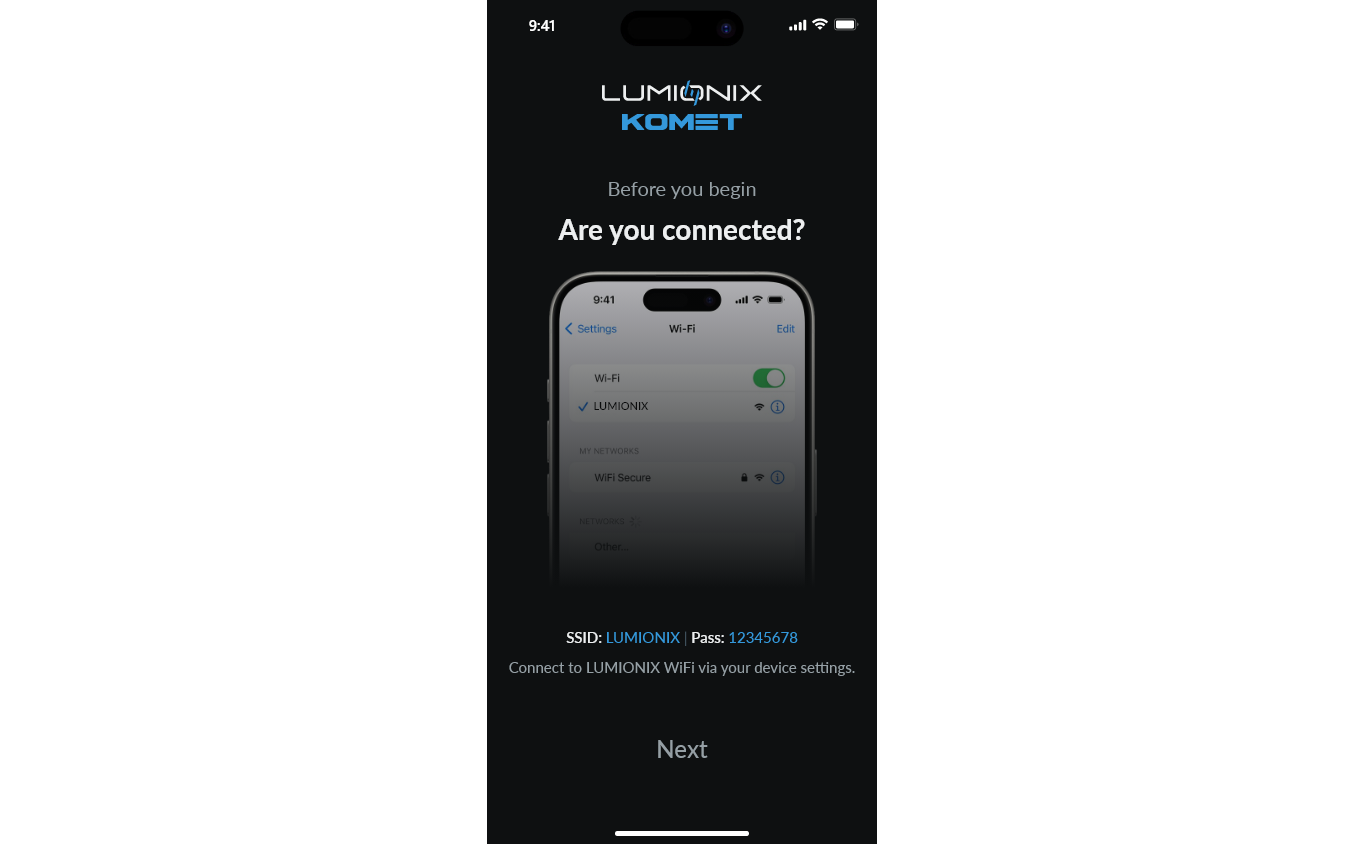
Joining LUMIONIX WiFi
KOMET creates a 2.4GHz WiFi hotspot with the SSID: LUMIONIX and Password: 12345678. Before connecting to KOMET, ensure your device is connected to the LUMIONIX WiFi network. To do this, minimize the app, navigate to your smartphone's WiFi settings, join the LUMIONIX network, and then return to the app.
Connecting to KOMET
You will be directed to the Connect screen with a checklist to ensure everything is properly set up before connecting to KOMET. Follow it for a seamless connection experience.
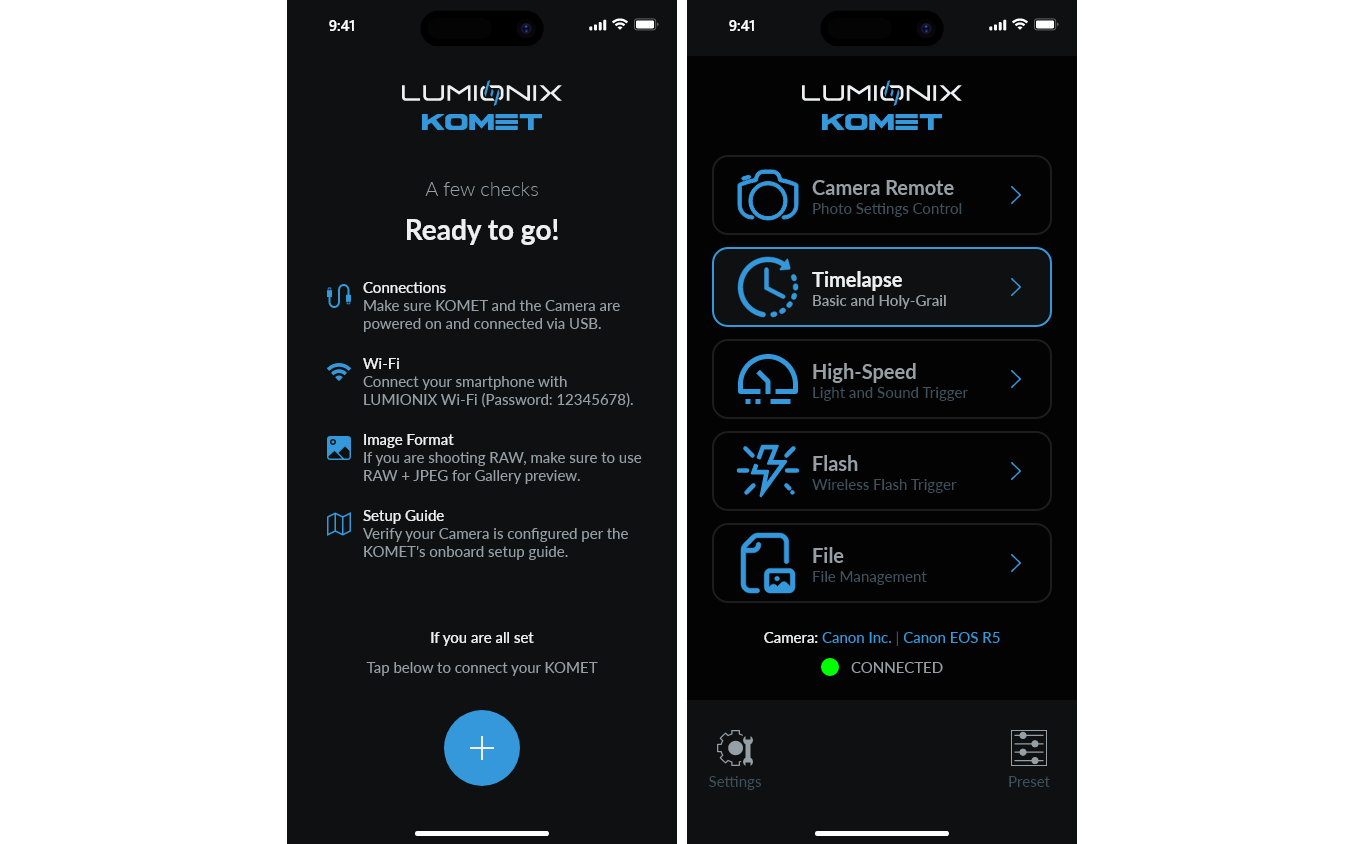
Upon connecting, KOMET will fetch the necessary data from the camera and open the HOME screen. As described in section 3.4, the App HOME screen will also showcase the same three status indications by Red/Yellow/Green Dot.
You are all set to explore the full potential of KOMET!